
High Performance Touring Bike Audio Upgrades That Actually Last
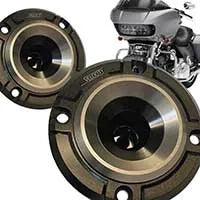
Upgrade your Harley audio parts for touring bikes with premium speakers, amps, and plug-and-play kits that deliver lasting sound at highway speeds.
Upgrade your Harley audio parts for touring bikes with premium speakers, amps, and plug-and-play kits that deliver lasting sound at highway speeds.

Upgrade your Harley with a saddlebag audio upgrade for powerful highway sound and clear surround audio.

Upgrade your ride with premium road glide speaker grills for better sound, protection, and custom style.

Upgrade your ride with a Harley fairing kit for wind protection, stability, and premium audio upgrades.

Upgrade your Harley fairing audio upgrade for crystal clear sound at highway speeds with plug-and-play kits.

Upgrade your ride with Road Glide speaker grills with tweeters for high-speed clarity and powerful audio that cuts through wind and road noise.

Discover the loudest motorcycle speakers that cut through highway wind noise for epic Harley audio upgrades.

Upgrade your ride with premium Harley speaker lids—color-matched, waterproof, and ready for powerful audio.

Upgrade your Street Glide speaker grills for better protection, style, and sound—find the perfect fit for your Harley today.

Compare the 2026 Harley Street Glide specs, performance, and touring features to find your perfect ride.

Master Harley speaker wiring with this step-by-step guide for a flawless audio install on your Harley.

Upgrade your ride with saddlebag lid speakers that deliver powerful sound at highway speeds.

Upgrade your Harley audio speaker setup for louder, clearer sound at highway speeds with marine-grade durability and easy plug-and-play installs.

Upgrade your Harley-Davidson with premium speakers for a Harley-Davidson that deliver crystal-clear sound over road noise and harsh weather.

Upgrade your Harley Road Glide speaker grills with metal mesh for style, protection, and better sound—easy plug-and-play installs.


AHB-T Harley Radio Interface Harness for Amplifiers INSTALLATION CONNECTIONS Optional Accessory Input. This optional plug should be left disconnected if you are using a DSR1. This plug connects to the...


